How to Use Wps Button to Configure My Range Extender to Extend the Coverage of an Existing Wireless Network?
How to Use Wps Button to Configure My Range Extender to Extend the Coverage of an Existing Wireless Network?
This article will describe how to set up a range extender using the WPS button. The steps can be the same as the QIG of each product, but there will be something different that you can know when you stay on this page from start to end.
Let’s Read:
How to Configure Range Extender Using the WPS Button?
STEP 1:
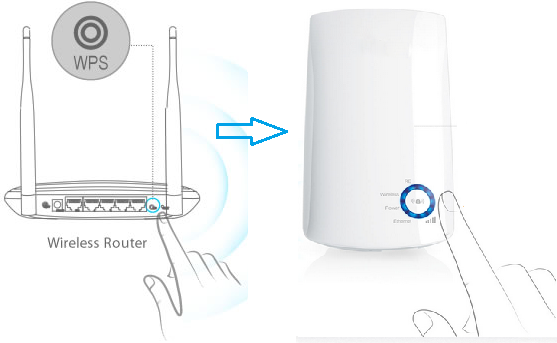
1. Place your Range Extender near your main AP/Router and plug it into a power outlet.
STEP 2:
There is one WPS button on your main AP/Router that you need to push. After that, you need to push the WPS button on your Range Extender.
Important Note: As we discussed above, you need to push the WPS button of your Router, but make sure, in the next two minutes, it is essential to push the WPS button of your Range Extender. After pressing the WPS button of your AP/Router, you can notice that the LED light will blink.
However, if the WPS LED light of your AP/router doesn’t blink, it is essential to press or push the WPS button. The same case applies to RE products. For that, you may also need to wait for the light of your Range Extender and need to push the button again if the light isn’t visible on the WPS/RE product.
STEP 3:
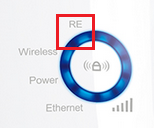
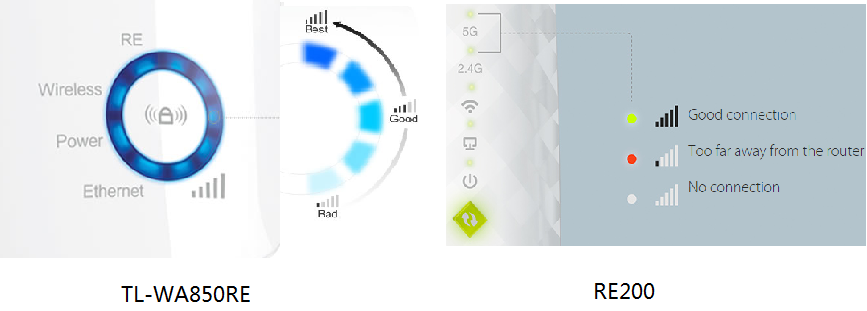
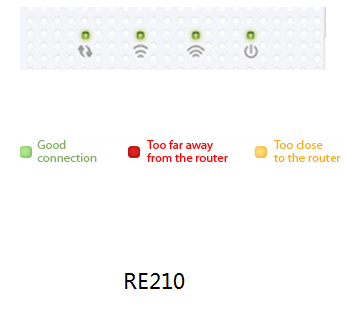
The total time to complete the WPS is 2 minutes, which means you need to wait at least two minutes, and after that, you need to check the LED signal of your wireless Range Extender.
If the lights are visible on your Range Extender and the signal bars are showing, you can understand that your Range Extender has been connected successfully to your main AP/Router.
STEP 4:
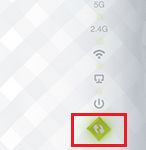
If your wireless Range Extender’s LED signal doesn’t come after two minutes, the failure can occur in the WPS operation. To avoid this issue, you need to follow the above instructions in a repeated manner and try the WPS process one, two, or more times.
STEP 5:
Finally, place the Range Extender at an accurate location and ensure that the coverage of the wireless network is appropriate. After this step, you don’t need to perform any repeated steps because once you are done with plugging, it will allow you to reconnect automatically.
Disclaimer
Users are advised to read the disclaimer carefully and thoroughly.Smart Device Assistant aims to provide you detailed information about Printer, Extender, Arlo and Alexa devices for your knowledge and help you fix any issue you are facing while using these devices. Smartdeviceassistant.com is not associated with any brand or is not a part of any Associate program or affiliate advertising program, and we don’t promote any product, brand, or software. Also, we don’t provide access to any outside links. If you’ve found any external link to our website, you can feel free to inform us, and we will remove it quickly. At Smartdeviceassistant, brand names and product logos are just for representation purpose. We are not responsible for any outside content or links.